Network Setup
Create a Network and a Subnet
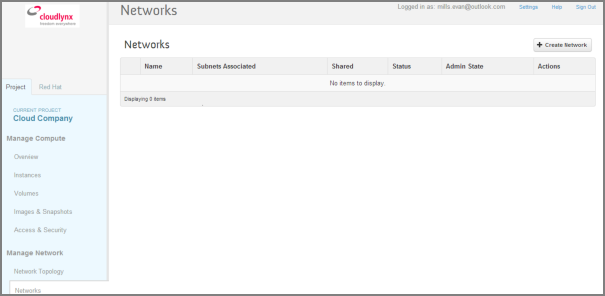
- Select the Networks sub-menu item under the Manage Network section on the side bar.
- Click on the Create Network button.
- The dialogue window which appears consists of the tabs Network, Subnet* and Subnet Detail.
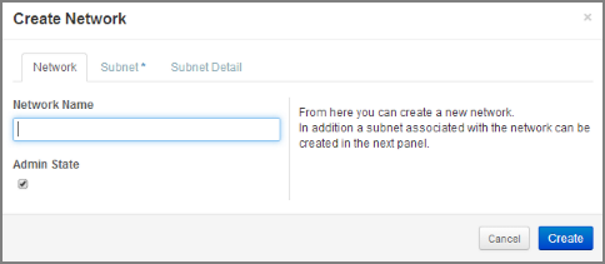
- Specify a name to identify the network in the Network Name field.
- Admin State field – checked by default. If check box is empty, it means the network is down and will not forward packets.
- Click on the Subnet tab.
- Specify a name for the subnet.
- Specify the IP address for the subnet (e.g. 192.168.0.0/24).
- Select IP version: IPv4 or IPv6 (IPv6 currently not applicable).
- Specify a Gateway IP address. This parameter is optional. If this field is left blank, the system will automatically take the first address of the defined subnet IP range (e.g. 192.168.0.1).
- Go to the Subnet Detail tab in order to define additional attributes for the subnet (all optional).
- Mark the Enable DHCP checkbox to enable DHCP.
- Click on the Create button in the dialogue window.
- The network is created.
- The network now appears in the list of networks under Manage Network -> Networks.
Note
A subnet must be specified to be able to launch an instance.
Note
A subnet represents an IP address block that can be used to assign IP addresses to virtual instances. Each subnet must have a Classless Inter-Domain Routing (CIDR) address and must be associated to a network. IP addresses can be either selected from the whole subnet CIDR or from allocation pools that can be specified by the user.
Note
A subnet can also optionally have a gateway, a list of DNS name servers, and host routes. This information is pushed to instances whose interfaces are associated with the subnet.
Router Setup
A router is needed to establish a connection between subnets or to connect a subnet to the public network so that the instances can be reached over the internet.
Create a Router
- Select the Routers tab on the side bar under the Manage Network section.
- Click on the Create Router button.
- In the Create Router dialogue box, specify a name for the router.
- Click on the Create Router button. The new router is now displayed in the Routers tab.

Set a Gateway
- Select the Routers tab on the side bar under the Manage Network section.
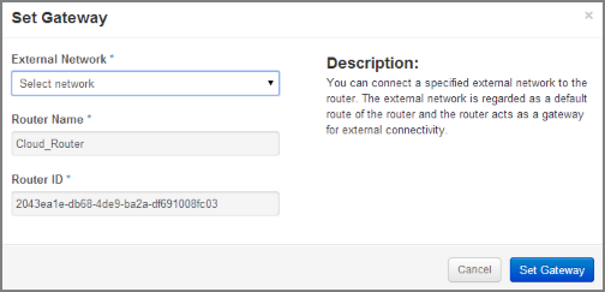
- Click on the Set Gateway button for the router you want to set a gateway for.
- In the External Network field, specify the network to which the router will connect (this is normally the public network, which is a connection to the Internet).
- Click on the Set Gateway button.
Connect a Private Network to a Router
- Select the Routers tab on the side bar under the Manage Network section.
- Click on the name of the router.
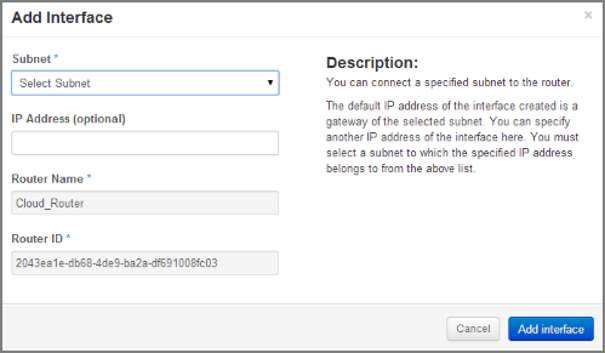
- On the Router Details page, click on the Add Interface button.
- In the Add Interface dialogue box, select a subnet from the Subnet dropdown list.
- Enter the router interface IP address for the selected subnet.
- Click on the Add Interface button to finish.
Note
If the IP address value is not set, the first host IP address in the subnet is used by default.
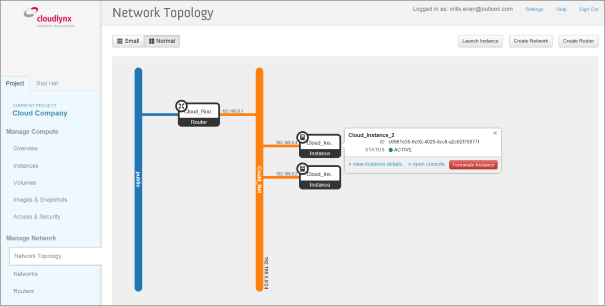
Network Topology
The Network Topology page represents a graphical overview of the created networks. The following buttons are available at the top of the Network Topology page:
- Launch Instance
- Create Network
- Create Router
There are also two buttons called Small and Normal. Those will change the view of the network topology, to either give you more space if you have a lot of networks (Small) or show you more details (Normal) including IP addresses and names.
Hover over Instance and Router icons to see the details and also to perform certain actions, for example:
- terminate an instance
- view instance details
- open the console
- delete a router
- delete an interface
By clicking on the network name the Network Detail page will be opened, showing a network overview, related subnets and ports.
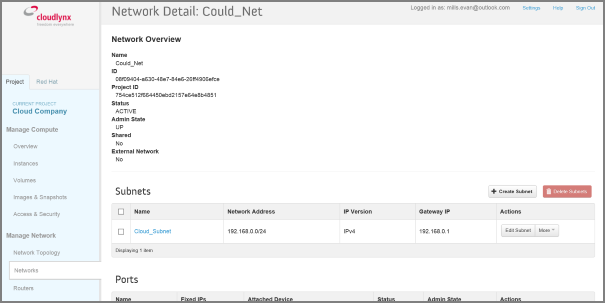
View Network Detail
- Select Network Topology on the side bar under the Manage Network section.
- Click on the name of the network you want to know more about.
- The Network Overview page of the selected network is displayed.
From the Network Overview page it is possible to create, edit or delete a subnet, as well as to edit ports.